The GUI of Document Converter
Document Converter offers two kinds of usages to convert your documents to other formats. One is the GUI usage and the other is virtual printer. The following figure is a screen snapshot of the main window of Document Converter. The menu bar is in the top of the main window; in the middle is a file list listing the files to be converted; some function buttons are in the bottom of the window.-
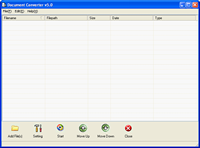
Fig.1
Fig.2 presents the items of [File] menu, where
[Add URL] is to add a URL for HTML conversion – convert html web page to other formats
[Add Files] is for adding files to the file list – a file picker dialog pops out after clicking this item
[Add Directory] is for adding a folder where all supported files will be added into the file list
[Settings] is for activating the setting dialog of the program
[Monitor a Special Directory] is for add a directory where all supported newly created files will be automatically converted to specified formats
[Exit] is to exit the program
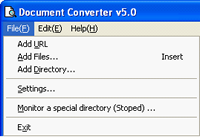
Fig.2
The below are the items of menu [Edit]:
[View Documents] is to view the selected files in the file list
[Delete Selected Items] is to delete selected items in the file list
[Delete All Items] is to remove all files of the file list
[Move Up] and [Move Down] is for resorting the order of files in the file list
Items in [Help] menu provides help information about Document Converter.
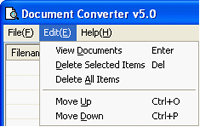
Fig.3
In the file list form of the main window, right-click activates the context menu that is displayed in Fig.4. The items of the context menu are similar with those of menu [File] and [Edit].
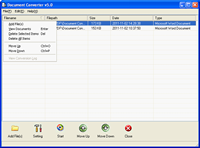
Fig.4
In the bottom of the main window of Document Converter, the function of button [Add File(s)] is the same as the item of [Add Files] in menu [File]. [Start] button is for starting the conversion process. Buttons of [Move Up] and [Move Down] are equal to those items of the same names in menu [Edit]. [Setting] button has the same function with that of item [Setting] in menu [File], which is to activate the setting dialog.
Fig.5 is the screen snapshot of the setting dialog.
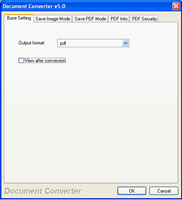
Fig.5
In tab of [Base Setting], the dropdown list provides those supported conversion target formats, and the check box is for switching the function of automatic viewing the converted documents after the conversion. Tabs of [Save Image Mode], [Save PDF Mode], [PDF Info] and [PDF Security] offer some advanced options for the conversion process.
After adding the files into the file list and setting necessary options, you can just press the [Start] button in the main window of Document Converter to launch the conversion.
|